> ## Documentation Index
> Fetch the complete documentation index at: https://docs.magic.link/llms.txt
> Use this file to discover all available pages before exploring further.
# Bitbucket Social Login with Magic
> You can allow your users to sign up & log in to your web app with their Bitbucket account.
## Usage
### Prerequisites
* You will need a [Bitbucket](https://bitbucket.org/) account
* You will need to have the [Magic SDK installed](/embedded-wallets/sdk/overview) into your web app
* You will need to have the [Magic SDK - OAuth Extension](/embedded-wallets/authentication/login/oauth/oauth-implementation) installed into your web app
### Bitbucket Setup (v1 extension)
After installing the OAuth extension, you can now enable Bitbucket Login for your Magic app:
1. Go to your [Magic Dashboard](https://dashboard.magic.link/login)
2. Select the Magic app for which you’d like to enable bitbucket Login, or create a new app
3. Navigate to **Authentication ->** **Social Logins** from the sidebar
4. Click the toggle for **Bitbucket**
5. Copy the **Redirect URI** field from your Magic Dashboard
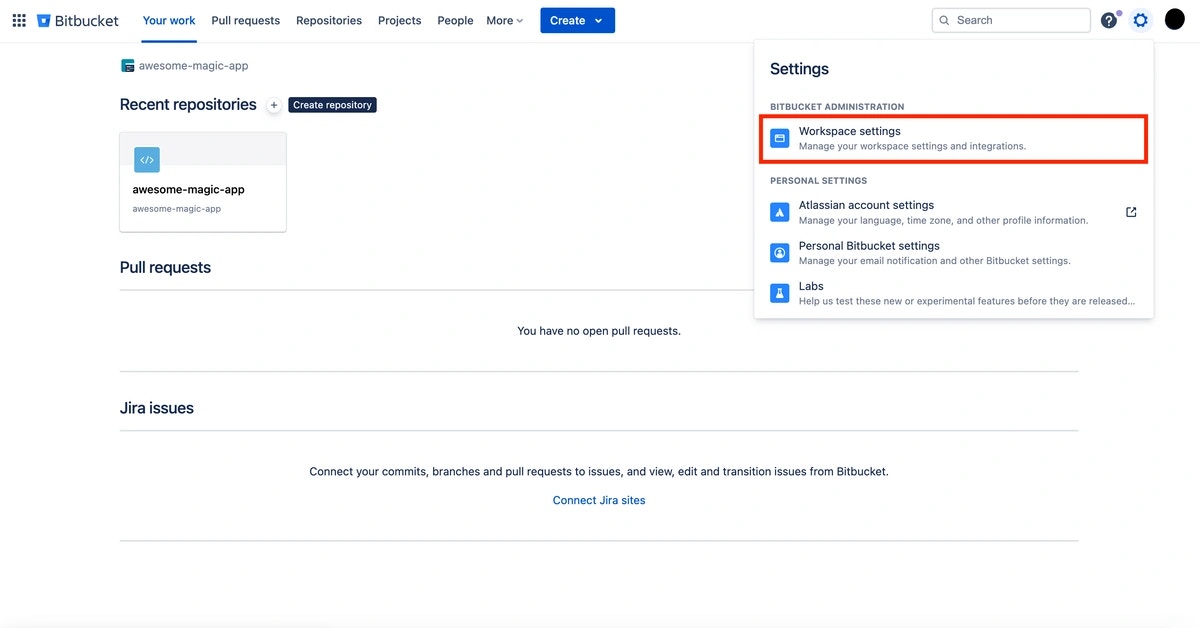
6. Go to Bitbucket App Dashboard. In the top right corner, click the profile avatar and select **Workspace settings.** Alternatively you can click on the profile avatar in the top right and choose **All workspaces** to open an entire list where you can then select **Manage** on the workspace you need.
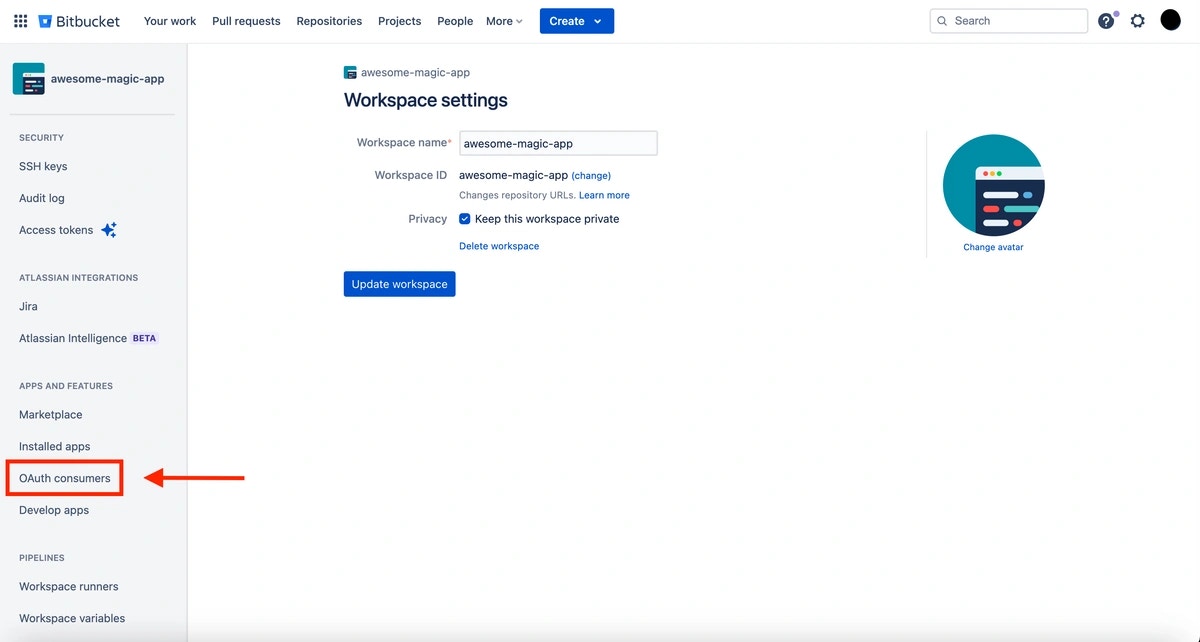
 7. On the left sidebar, scroll down to the **Apps and Features** header and click **OAuth consumers**, then click the **Add consumer** button
 8. Add the **Name** along with the **Redirect URI** you obtained from your Magic Dashboard into the **Callback URL** and click **Save**
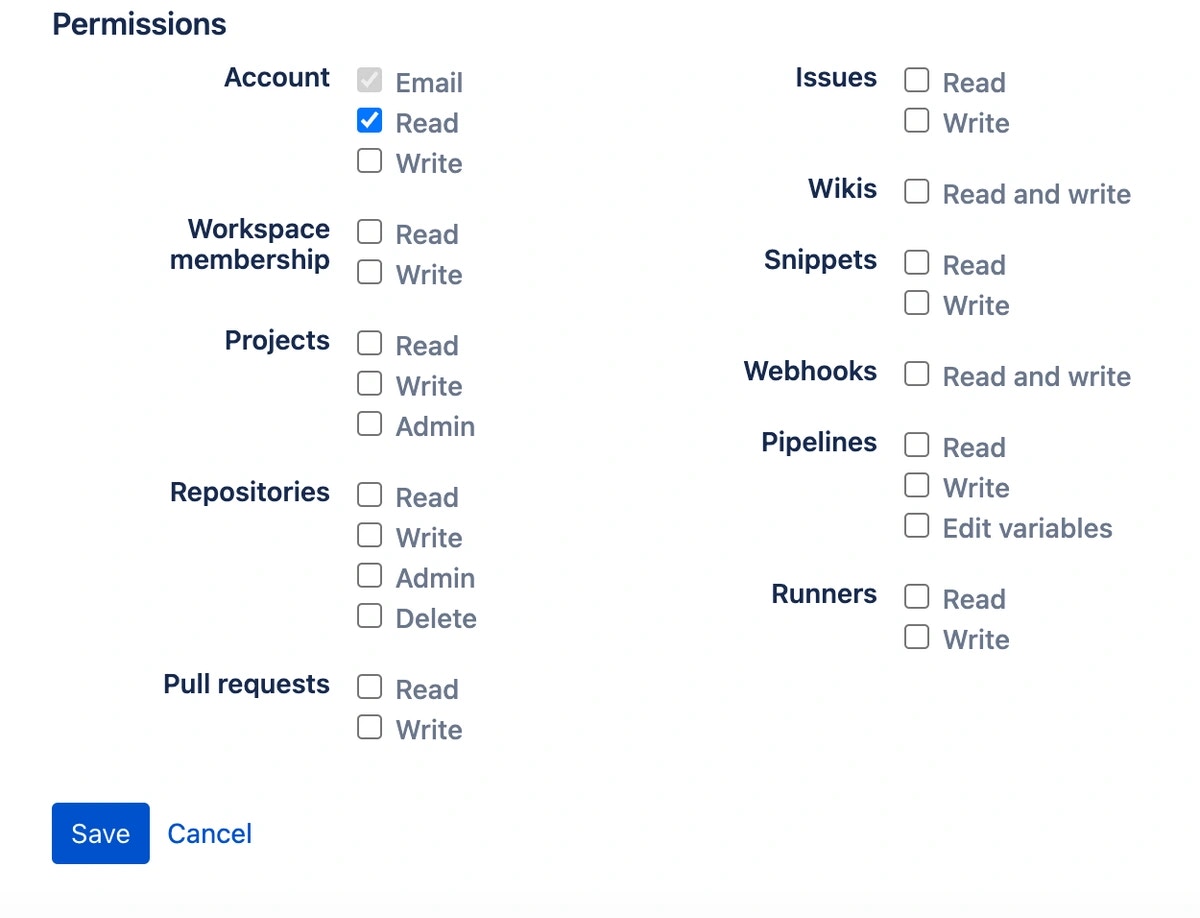
9. Please make sure at least to grant **Read** permission in the account section. Otherwise, authentication will not complete.
8. Add the **Name** along with the **Redirect URI** you obtained from your Magic Dashboard into the **Callback URL** and click **Save**
9. Please make sure at least to grant **Read** permission in the account section. Otherwise, authentication will not complete.
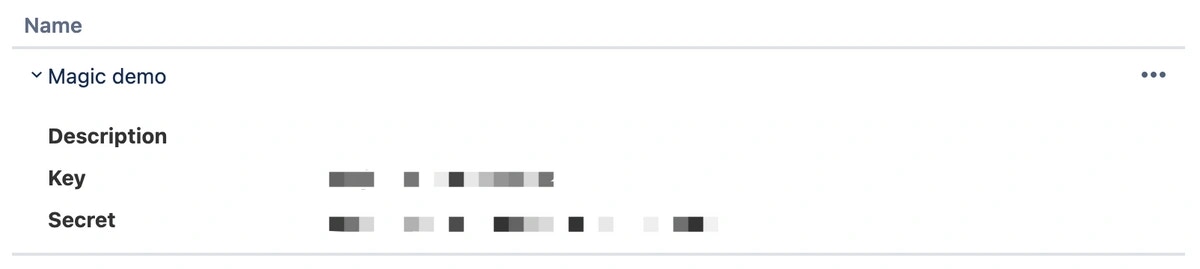
 10. Obtain the **"Key"** and **"Secret"**
 11. Return to your Magic Dashboard and input the **Key** and **Secret** for your bitbucket OAuth app
12. In Magic Dashboard, click **“Save”** – Done!
### Bitbucket Setup (v2 extension)
* Follow above steps, but disregard Magic's **Redirect URI** in step 5
* In step 8, paste the **Redirect URI** you are passing in as the **redirectURI** argument to the **loginWithRedirect** method
```javascript JavaScript icon="square-js" theme={null}
await magic.oauth2.loginWithRedirect({
provider: 'bitbucket',
redirectURI: 'https://your-app.com/your/oauth/callback', // <== whitelist this with Bitbucket
});
```
## Resources
* [Bitbucket Social Login Demo](https://magic-oauth-v2-dun.vercel.app)
11. Return to your Magic Dashboard and input the **Key** and **Secret** for your bitbucket OAuth app
12. In Magic Dashboard, click **“Save”** – Done!
### Bitbucket Setup (v2 extension)
* Follow above steps, but disregard Magic's **Redirect URI** in step 5
* In step 8, paste the **Redirect URI** you are passing in as the **redirectURI** argument to the **loginWithRedirect** method
```javascript JavaScript icon="square-js" theme={null}
await magic.oauth2.loginWithRedirect({
provider: 'bitbucket',
redirectURI: 'https://your-app.com/your/oauth/callback', // <== whitelist this with Bitbucket
});
```
## Resources
* [Bitbucket Social Login Demo](https://magic-oauth-v2-dun.vercel.app)